Smith Berry Barn

ground cinnamon

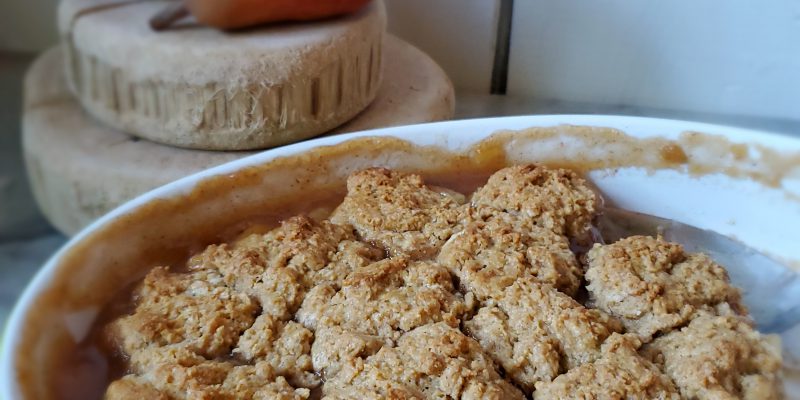
Spiced Pear Cobbler

October 9, 2020

Spiced Pear Cobbler
Print Recipe
This is a perfect dessert to enjoy in the fall, featuring fresh, ripe pears and seasonal spices. Best served warm with vanilla ice cream!
Servings Prep Time
6-8 servings 30 minutes
Cook Time Passive Time
45 minutes 30 minutes
Servings Prep Time
6-8 servings 30 minutes
Cook Time Passive Time
45 minutes 30 minutes
Ingredients
For the Filling
  • 3 Tbs butter
  • 8 each fresh, ripe pears peeled, cored and cut into pieces
  • 1 cup sugar
  • 1/4 cup corn starch
  • 1 tsp cinnamon
  • 1/2 tsp ground ginger
  • 1/2 tsp salt
  • 1 tsp pure vanilla extract
For the Topping
  • 1 1/2 cups all purpose flour
  • 1/2 cup brown sugar packed
  • 1 tsp baking powder
  • 1 tsp ground cinnamon
  • 1/4 tsp ground ginger
  • 1/4 tsp allspice
  • 1/4 tsp freshly ground nutmeg
  • 1/4 tsp salt
  • 1/4 cup unsalted butter chilled and cut into pieces
  • 1/4 cup half & half
Servings: servings
Instructions
To prepare the Filling
  1. Preheat oven to 350 degrees.
  2. Mix all dry ingredients in bowl and set aside.
  3. Melt butter in a skillet over medium heat on the stovetop. Add pears and stir to coat.
  4. Add the sugar mixture and stir to coat pears. Continue cooking and stirring carefully until sugar mixture is dissolved and becomes thickened and bubbly, approximately 5 minutes.
  5. Stir in the vanilla and remove from heat. Transfer pear mixture to a 2 quart baking dish and place in preheated oven while you prepare the topping dough. (Remove from oven after 10 minutes or as soon as topping is ready to be added)
To prepare the Topping
  1. Place all dry ingredients in a mixing bowl and stir to combine.
  2. Add the diced butter and mix with a hand-held pastry blender until well mixed and the butter is in pea-sized pieces. (You may use a fork or your fingers for this step if you prefer)
  3. Add the half & half to the mixing bowl and stir gently until the mixture just comes together and resembles a soft dough.
  4. Remove the baking dish from the oven if it's not already out. Carefully drop the dough by spoonfuls onto the pear mixture.
  5. Place the baking dish back in the oven and bake for 30 minutes, or until the topping is lightly browned and filling is bubbling.
  6. Once removed from the oven, allow to cool slightly. Can be served warm or at room temperature.

Apple Butter

October 15, 2019

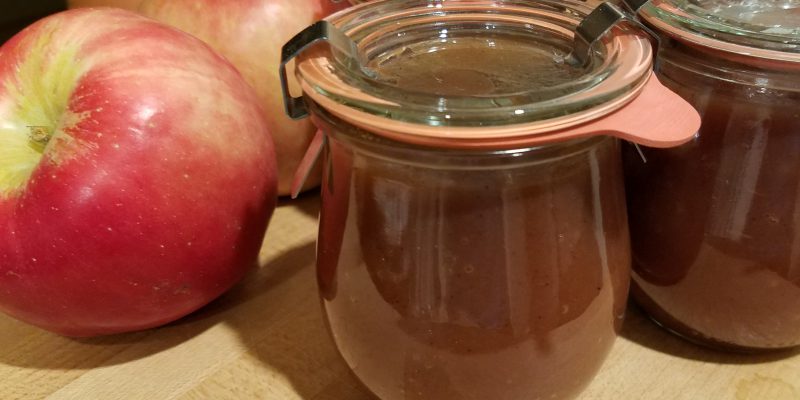
Apple Butter
Print Recipe
This is an easy, mostly hands-off recipe, that allows you to prep your apples and let the slow cooker do most of the work. You will want to time your cooking accordingly, however, so that you can fit it all into one day. Enjoy this apple butter many ways...spread onto baked goods, stirred into oatmeal or as a topping for savory meats, such as pork or chicken. It's delicious simply by the spoonful, too!
Servings Prep Time
6 half pints 30 minutes
Cook Time Passive Time
12 hours 12 hours
Servings Prep Time
6 half pints 30 minutes
Cook Time Passive Time
12 hours 12 hours
Ingredients
  • 6 lbs apples peeled, cored and sliced (approximately 15-18 medium apples)
  • 1/2 cup sugar
  • 1/2 cup brown sugar
  • 2 1/2 teaspoons ground cinnamon
  • 1/2 teaspoon freshly grated nutmeg
  • 1/4 teaspoon ground cloves
  • 1/2 cup fresh apple cider
Servings: half pints
Instructions
  1. Peel, core and slice your apples and place into the slow cooker.
  2. Sprinkle the sugar and spices over the apples and stir to combine as best you can. Feel free to add the spices halfway through to make mixing easier. Don't worry if it doesn't mix thoroughly, as the spices will become incorporated as the apples cook down.
  3. Pour the fresh apple cider over the apple mixture.
  4. Set your slow cooker to the 'low' setting and allow to cook for approximately 10 hours. You may want to stir your apples a couple of times during this process, however it is generally not necessary.
  5. After approximately 10 hours, carefully blend the apple mixture with an immersion blender until smooth. Be careful of splatter, since mixture will be very hot.
  6. Once blended, remove the lid and set your slow cooker to the 'high' setting for approximately 2 hours. This will reduce your apple mixture to a more concentrated state. Stir the mixture on occasion and turn down the setting if it seems necessary. Your apple butter is finished when it has thickened to a creamy, spreadable consistency.
Recipe Notes

This apple butter can be stored in the refrigerator for a week or so.  It can also be frozen or canned according to the specific guidelines for apple butter.  We use the Ball Blue Book Guide to Preserving, or you may visit the Ball Canning website for instructions.

Baked Apples with Crisp Topping

October 12, 2016
Course

Baked Apples with Crisp Topping
Print Recipe
Part 'baked apple', part 'apple crisp'...but no matter what you call it, it tastes delicious! And it's easy to make! Many of our apple varieties are great for baking. We like Jonathan, Jonagold, Honeycrisp or Empire, just to name a few. Special thanks to long-time staffer, Teanna, and neice, Summer, for their help developing this yummy recipe!
Servings Prep Time
12 servings 30 minutes
Cook Time Passive Time
45 minutes 45 minutes
Servings Prep Time
12 servings 30 minutes
Cook Time Passive Time
45 minutes 45 minutes
Ingredients
Start with
  • 6 medium apples
  • 1 cup apple cider (sub water if necessary)
  • 12 Tbs raspberry rhubarb jam (Smith Berry Barn brand is the best!)
For the Topping
  • 1/2 cup butter
  • 1/2 cup all purpose flour
  • 1/4 cup brown sugar
  • 1/4 cup oatmeal
  • 1/4 cup hazelnuts (chopped)
  • 1/2 tsp ground cinnamon
  • 1/4 tsp salt
  • 1 pinch freshly grated nutmeg
Servings: servings
Instructions
Prep the apples
  1. Preheat oven to 350 degrees.
  2. Core each apple and slice in half length-wise.
  3. Scoop out a bit more of the center of each cored area to create a small well for the jam.
  4. Fill each well with approximately 1 Tbs jam.
  5. Place apples (cut side up) in a 9"x13" baking dish.
  6. Pour cider (or water) into bottom of baking dish.
Prep the Crisp
  1. Mix all remaining ingredients with a pastry blender until blended and crumbly. A food processor will work, as well, but be careful not to over-mix.
  2. Evenly distribute the topping mixture on top of each apple half, mounding and pressing lightly to keep it in place.
  3. Bake 35-45 minutes, until apples are softened and topping is golden-brown. Test for doneness by piercing apple with a fork. Baking times will vary depending on the variety of apple you choose.
  4. Serve warm with vanilla ice cream.
Recipe Notes

This recipe can easily be cut in half using an 8"x8" baking dish and half the apples. ??However, we recommend preparing the entire topping recipe, so you can refrigerate or freeze the other half to use at a later date.

Winter Squash Soup

October 12, 2016
Course

Winter Squash Soup
Print Recipe
We serve this hearty soup at our annual Heirloom Apple Festival and it gets rave reviews! Use any type of winter squash you would like, just vary the quantity, depending on the size of the squash.
Servings Prep Time
8 servings 1 hour
Cook Time Passive Time
1.5 hours 1 hour
Servings Prep Time
8 servings 1 hour
Cook Time Passive Time
1.5 hours 1 hour
Ingredients
For the Squash
  • 4 each acorn squash (or 2 medium butternut or 1 hubbard or other large squash)
  • 2 each fresh pears (peeled, cored and quartered)
  • 1 each sweet onion (quartered)
  • 1/4 cup melted butter
  • salt and pepper to taste
For the Soup
  • 4 cups chicken broth (sub vegetable broth for vegetarian option)
  • 1/4 tsp ground red pepper
  • 3/4 tsp ground cinnamon
For the Finish
  • 1-1/2 tsp salt (or to taste)
  • fresh ground pepper (liberal or to taste)
  • 1 cup heavy whipping cream
Servings: servings
Instructions
To prepare squash
  1. Preheat oven to 400 degrees.
  2. Cut squash in half, scoop out seeds and place in 9"x13" baking dish with cut-side facing up. You may need more than one baking dish depending on the size of your squash. See notes below.
  3. Place onions and pears around squash, filling all the spaces in the baking dish.
  4. Drizzle with melted butter and season with salt and pepper.
  5. Bake in oven approximately 45 minutes, or until fork-tender.
  6. Remove from oven and allow to cool enough that you can handle the squash. Scoop the flesh of the squash, discarding the skins.
  7. Place all ingredients from baking dish(es) into large stockpot and proceed with making the soup.
To prepare soup
  1. Add all remaining ingredients to stock pot with the squash mixture.
  2. Heat on medium heat, stirring occasionally, until mixture begins to bubble.
  3. Reduce heat to low and simmer, stirring occasionally, for 20 minutes.
  4. Remove soup from heat and puree the soup using an immersion blender. Puree until smooth (you may have a few onion pieces that won't puree...that's fine!)
To finish soup
  1. Add the heavy whipping cream, salt and liberal grindings of fresh pepper and stir to combine.
  2. Taste for seasonings and adjust if necessary.
Recipe Notes

We find that because of the varying sizes in squash, it's sometimes necessary to use more than one baking dish to roast the squash. ??Your baking dishes should be full but not too full, so if necessary, place ingredients into two dishes and place them side by side in your oven.

Also, the seasonings may need adjusting, due to the variations in the squash. ??Simply taste your soup and add more of each of the seasonings to taste. ??This soup comes out a little different each time we make it, but it's very forgiving!

Enjoy this soup with a crusty loaf of bread and a salad as a complete meal...or serve as an appetizer in small mugs at a holiday gathering.

If you end up with too much soup, place remaining soup in freezer containers and freeze for a later date! ??Enjoy!