Smith Berry Barn

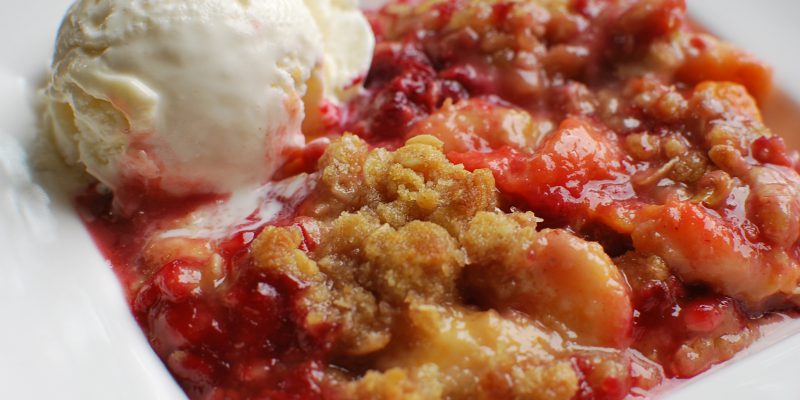
Raspberry Rhubarb Crisp

July 29, 2016
Course

Raspberry Rhubarb Crisp
Print Recipe
As with most of our berry dessert recipes, this one can be altered to use just about any fruit you would like. We love the raspberry/rhubarb combo, but any berry medley is wonderful...simply adjust the amount of sugar to taste.
Servings Prep Time
6 servings 30-40 minutes
Cook Time
40 minutes
Servings Prep Time
6 servings 30-40 minutes
Cook Time
40 minutes
Ingredients
Ingredients for Filling:
  • 3 cups rhubarb (approx 5 stems)
  • 3 cups raspberries
  • 1 tsp fresh lemon juice
  • 1/2 tsp lemon zest
  • 1/2 cup sugar
  • 2 Tbs cornstarch
  • 1/4 tsp cinnamon
  • 1/8 tsp salt
Ingredients for Topping:
  • 1 cup flour
  • 1 cup brown sugar
  • 1/2 cup oatmeal
  • 1/3 cup melted butter
Servings: servings
Instructions
To prepare the filling:
  1. Preheat oven to 350 degrees.
  2. Prepare the rhubarb by dicing into 1/2" pieces and steaming on the stove top for approximately 3 minutes. Just enough to soften slightly.
  3. In large mixing bowl, gently mix together the berries, rhubarb, lemon juice and lemon zest.
  4. In a separate bowl, mix together the sugar, corn starch, cinnamon and salt until well combined.
  5. Sprinkle dry mixture over berry mixture and stir gently.
  6. Place berry mixture into a buttered 8" square baking pan.
  7. Bake berry mixture for approximately 15 minutes, while you prepare the topping. This allows the fruit mixture to cook and set, without over-baking the topping.
To prepare the topping:
  1. In a large mixing bowl, mix together the flour, brown sugar and oatmeal.
  2. Add the melted butter and stir to combine. You should have a crumbly mixture when fully incorporated. Use your fingers if you'd like!
  3. Remove berry mixture from the oven and carefully sprinkle the topping mixture over entire surface of fruit.
  4. Raise oven temperature to 375 degrees and place pan back in oven to finish baking. Bake for approximately 20 minutes, or until topping is golden brown and filling is bubbly.
Recipe Notes

Sometimes when our fruit is extra juicy, we lose some of our topping into the berry mixture. ??We don't mind, though...just top it with some vanilla ice cream and watch it disappear!

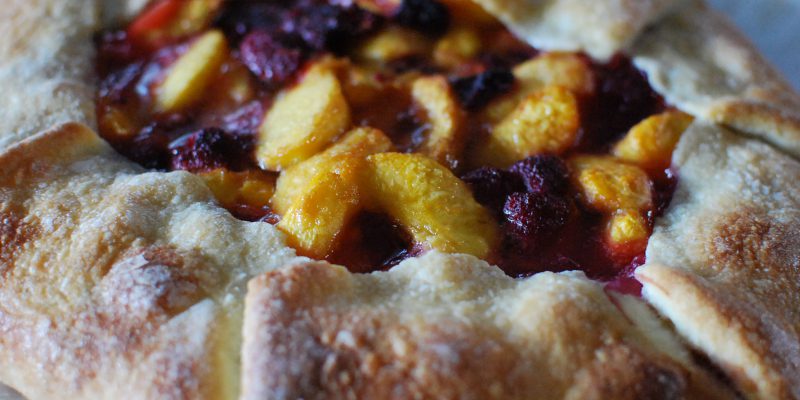
Rustic Raspberry Peach Tart

July 28, 2016
Course

Rustic Raspberry Peach Tart
Print Recipe
This is a versatile recipe...use any combination of fruit and/or berries, fresh or frozen. Simply adjust your sugar slightly, to accommodate the natural sweetness of the various fruit used.
Servings Prep Time
6-8 servings 30 minutes
Cook Time Passive Time
40 minutes 2 hours
Servings Prep Time
6-8 servings 30 minutes
Cook Time Passive Time
40 minutes 2 hours
Ingredients
Ingredients for Dough:
  • 1 1/4 cup all purpose flour
  • 2 tsp sugar (plus extra for topping)
  • 1/2 tsp salt
  • 8 Tbs chilled unsalted butter (7 Tbs for dough, 1 Tbs for topping)
  • 2 Tbs ice water
  • 2 Tbs sour cream (sub plain yogurt if necessary)
Ingredients for Filling:
  • 4-5 fresh, ripe peaches (peeled and sliced)
  • 1 pint fresh raspberries (approx 2 cups)
  • 3 Tbs sugar
  • 2 Tbs cornstarch
  • 1/2 fresh lime (juice and zest)
Servings: servings
Instructions
To prepare the dough:
  1. Mix dry ingredients (flour, sugar, salt) in food processor just until blended.
  2. Add 7 Tbs chilled, diced butter and pulse in food processor until butter is the size of peas (approx 10-12 pulses).
  3. Mix together the ice water and sour cream and add mixture to food processor, while pulsing to bring dough together.
  4. Pulse just until dough comes together and begins to form a ball.
  5. Turn dough onto a floured surface and pat into a 6 inch disc. Wrap in plastic wrap and chill for approximately 2 hours.
  6. After dough has chilled, place disc on a piece of parchment paper and roll out to a 14-16" circle (this doesn't need to be perfect...that's why we call it 'rustic'!)
  7. Slide parchment paper with dough circle onto a cookie sheet and place back in fridge while you prepare the filling.
To prepare the filling:
  1. Preheat oven to 400 degrees.
  2. Peel and slice peaches into large mixing bowl.
  3. Add fresh raspberries and the zest and juice of the half lime.
  4. In a separate bowl, mix sugar and cornstarch together, then sprinkle over fruit mixture and toss gently. Do not over mix!
  5. Remove the dough from the fridge and spoon the filling into the center of dough circle. Spread fruit out gently, leaving a space approximately 2 inches from edge of dough.
  6. Gently fold edges of dough over the edge of filling, making folded pleats as you move around the circle. It is not necessary to be perfect, but try to keep dough from cracking (patch if necessary by pressing dough together with fingertips). This will help keep any juices from escaping.
Finishing touches:
  1. Melt the remaining Tbs of butter and brush over top edge of dough, using a pastry brush. Sprinkle remaining melted butter over fruit mixture in center of tart. To finish, sprinkle sugar over dough edges. If you wish, you may substitute different types of sugar: superfine, turbinado, cinnamon sugar, etc.
To bake:
  1. Place cookie sheet with tart into preheated oven. Bake approximately 40 minutes, or until crust is golden brown and filling is bubbly. Allow to cool slightly and serve warm with vanilla ice cream.

Dill Pickles

March 21, 2016

Dill Pickles
Print Recipe
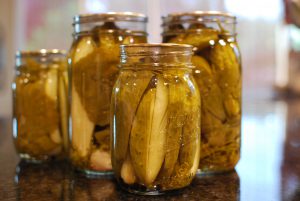
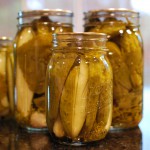
Our dill pickle recipe has been modified over the years, but originated from a customer who taught us about using our own fresh grape leaves to help keep our pickles crisp. We take special orders each season for pickling cukes and dill, and we have grape leaves available as a specialty u-pick crop. Please ask us for details!
Servings Prep Time
24 Quarts (25 lb bag) 60+ minutes
Cook Time
60+ minutes
Servings Prep Time
24 Quarts (25 lb bag) 60+ minutes
Cook Time
60+ minutes
Ingredients
Ingredients for Brine (requires 2+ batches):
  • 4 cups white vinegar
  • 12 cups water
  • 1 cup pickling salt
Ingredients for Pickles (per each jar):
  • 1-2 each grape leaves (fresh picked)
  • 2 heads fresh dill
  • 1/2 teaspoon whole black peppercorn
  • 1/4 teaspoon mustard seed
  • 5 whole cloves fresh garlic (peeled)
  • 1-2 each dried chili peppers (optional)
Servings: Quarts (25 lb bag)
Instructions
Canning instructions:
  1. This recipe provides the ingredients and some tips for making pickles, however we will not be providing complete instructions for the canning process. For the most current instructions for safe canning methods, we prefer that you use a reputable source for canning your pickles. We use the Ball Blue Book (freshpreserving.com) for proper canning and water bath instructions for making Kosher Dill Pickles. You may also click below on Our Favorite Links for links to several home canning websites.
Before you begin:
  1. Pickling cucumbers are best when they are harvested within one to two days of when you plan to pickle, so place your orders accordingly. Be sure to have your jars, ingredients and equipment ready ahead of time. Jars must be sterilized prior to canning. Once your work station is ready, you will want to begin simmering the water for your water bath so it's ready when you are. Place your pickling cukes in a large bowl or bin of cold water to allow you to clean and sort more easily.
To make the brine:
  1. Place all of the brine ingredients in a large stock pot and bring just to a boil. Reduce heat and simmer while you prepare your pickles. You will be adding the brine to your jars of pickles just before you seal them for placing into the water bath. You may want to increase your brine recipe to make sure you have enough to fill all of your jars. You will need to make several batches of brine depending on how many jars of pickles you end up making.
Filling your jars:
  1. Each jar should be filled with the ingredients listed above. Most water bath canners will hold 6-7 quart jars at one time, so you will only need to fill that many jars at once and then fill another 6-7 as those are boiling in the water bath. To fill each jar, place the grape leaves on the inside wall of the jar, overlapping the two leaves slightly. Add all of the spices, including the heads of dill to the bottom of the jars, being careful not to disrupt the grape leaves too much. Finally, add the cucumbers. Try to pack as many cucumbers in the jar as possible, making sure they don't stick out of the top of the jar. You will want approximately 1/4-1/2" of head space in each jar. Cucumbers vary in size, so you will want to sort through your cukes and select different sizes to completely fill your jars. You may also slice or cut your pickles into spears in order to make them fit better.
Finishing your pickles:
  1. You will finish your pickles by pouring the hot brine into each jar, being sure to leave the proper head space. Place in the water bath for the recommended length of time. Once pickles are finished, they should be store for several weeks (approx 6) to develop the flavor.