Smith Berry Barn

Chicken Pesto Pasta

September 20, 2017

Chicken Pesto Pasta
Print Recipe
This is an easy, delicious pasta dish that can be made even easier if the chicken is pre-cooked. Simply grill a few extra chicken breasts when it's convenient and keep in fridge until ready to use.
Servings Prep Time
4-6 servings 20 minutes
Cook Time
20 minutes
Servings Prep Time
4-6 servings 20 minutes
Cook Time
20 minutes
Ingredients
  • 3 chicken breasts (boneless, skinless)
  • 16 ounces penne pasta
  • 1-2 Tbsp olive oil
  • 2 handfuls fresh green beans
  • 1/2 pint cherry tomatoes
  • 1/2 cup basil pesto
  • 1/2 cup chicken broth
  • 1/2 cup half & half
  • salt & pepper (to taste)
  • Parmesan cheese (shredded as garnish)
Servings: servings
Instructions
To cook the chicken:
  1. Season the chicken breasts with salt and pepper and cook on an outdoor grill (for best flavor) or an indoor grill pan. This should take about 10-12 minutes, depending on your method. Just be sure the chicken is done all the way through and the juices run clear.
  2. Once cool enough to handle, cut the chicken into bite size pieces and set aside to keep warm until ready to use.
To prepare the pasta:
  1. While the chicken is cooking, start a large pot of salted water to boil for the pasta (this water will also be used to cook the beans).
  2. While the water is coming to a boil, rinse and prepare the veggies. Slice any large cherry tomatoes in half or quarters.
  3. Once the water has come to a boil, place the beans in the boiling water and blanch them for approximately 3-4 minutes. Once finished, use a slotted spoon to remove beans onto a cutting board and cut into 1" pieces.
  4. Drizzle 1-2 Tbsp olive oil into a saute pan on medium heat. Add beans and saute for approximately 5 minutes, or until they have started to become slightly golden brown on edges.
  5. Add sliced cherry tomatoes and saute for 1-2 minutes, until slightly softened.
  6. Add chicken pieces to veggie mixture and toss gently.
  7. Add chicken broth and pesto to veggie/chicken mixture and stir until evenly coated with sauce.
  8. Add half & half to sauce and incorporate. You may decide you need more or less half & half, depending upon your taste for creaminess.
To finish the pasta
  1. Season with salt and freshly ground pepper to taste. (S&P can be added to veggies while they are cooking)
  2. Top with freshly grated Parmesan cheese.
Recipe Notes

You can make this recipe your own by using whatever veggies or other ingredients you have on hand. We often use diced zucchini and summer squash, along with the beans. You may also add olives and/or artichoke hearts for more flavor. ??Have fun with this basic, adaptable recipe!

Fresh Basil Pesto

September 16, 2017

Fresh Basil Pesto
Print Recipe
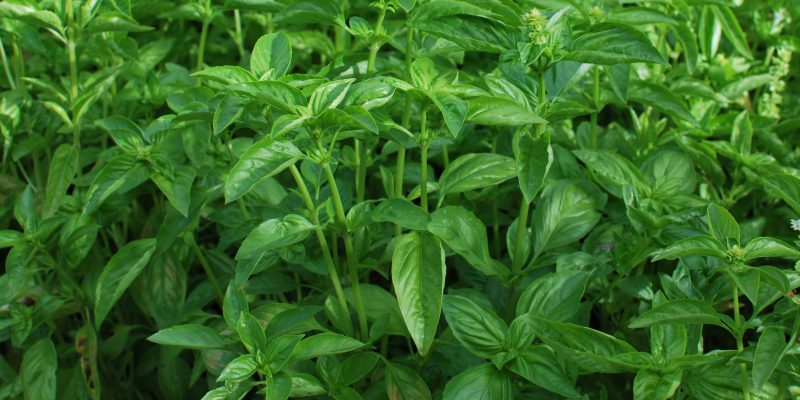
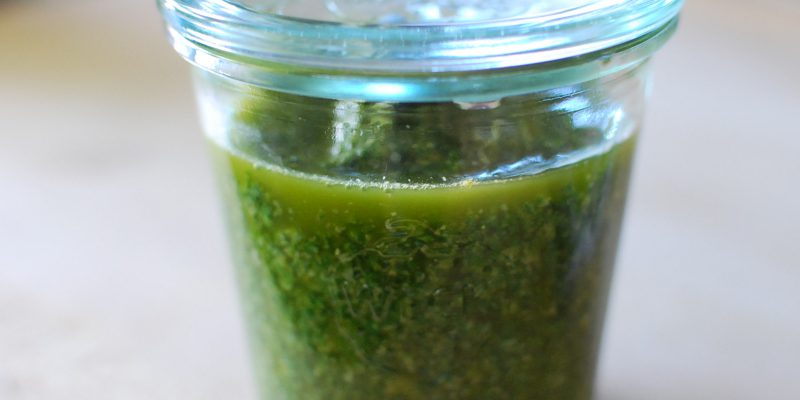
Basil is sometimes difficult to grow in the Pacific Northwest, however we usually get a nice harvest in mid-late September and make large batches of this pesto to freeze for winter. See our notes below if you plan to freeze your pesto.
Servings Prep Time
1 cup 30 minutes
Servings Prep Time
1 cup 30 minutes
Ingredients
  • 4 cups (packed) fresh basil leaves (rinsed and patted dry)
  • 2-3 cloves garlic
  • 2 Tbsp pine nuts
  • 1/2 cup Parmesan cheese (freshly grated)
  • 1/4 tsp salt
  • 1/2 cup olive oil
Servings: cup
Instructions
  1. Remove fresh basil leaves from main stems, rinse and pat dry.
  2. Place basil leaves in bowl of food processor, along with garlic cloves and pine nuts.
  3. Pulse all ingredients in food processor until finely chopped.
  4. Add Parmesan and salt and pulse again to lightly incorporate.
  5. Add olive oil to food processor and pulse until pesto is at the desired consistency.
Recipe Notes

A note about freezing: ??We often freeze our pesto for use during the winter months in everything from pasta sauce, pizza topping and hearty soups. ??Simply omit the Parmesan and proceed with the basic recipe, pour the pesto into flexible muffin tins or ice cube trays and pop into freezer bags once they are frozen. ??The frozen cubes of pesto can be defrosted or put right into hot sauces and allowed to defrost while cooking. ??We tend to omit the pine nuts, as well, to keep our pesto very basic and add the Parmesan and nuts only if desired once defrosted.

Fresh Applesauce

October 12, 2016

Fresh Applesauce
Print Recipe
Use this basic recipe for fresh applesauce and create different flavor profiles by mixing varieties of apples. See our suggestions below for the best apples to use for saucing. For added flavor, try adding cinnamon or ginger to taste.
Servings Prep Time
4 pints 20-30 minutes
Cook Time
30 minutes
Servings Prep Time
4 pints 20-30 minutes
Cook Time
30 minutes
Ingredients
  • 16 medium apples (approximately 6 lbs)
  • 1/2 lemon (juice and zest)
  • 1 cup water
  • 1/4 cup brown sugar
  • 1/4 cup white sugar
  • 1/4 tsp salt (optional)
Servings: pints
Instructions
  1. Peel, core and slice apples.
  2. Place all ingredients, including apples into large stock pot.
  3. Bring just to a boil on medium-high heat.
  4. Reduce heat to medium-low and simmer for 20-30 minutes, stirring (mashing) occasionally with potato masher.
  5. Sauce is finished when apples have softened completely. Sauce will be slightly chunky. If a smoother consistency is desired, run the sauce through a food mill or food processor.
  6. Sauce may be frozen for up to 6 months, or canned following specific canning guidelines for applesauce.
Recipe Notes

Apple Suggestions: ??We use at least two varieties in our sauce and can give you ideas on which varieties to combine for the best flavor and texture. ??Some of our favorite apples for saucing include McIntosh, Liberty, Gravenstein, Akane, Jonagold and Melrose. ??Stop in for samples and check out our Apple Variety list for information on the best apples for saucing.

Baked Apples with Crisp Topping

October 12, 2016
Course

Baked Apples with Crisp Topping
Print Recipe
Part 'baked apple', part 'apple crisp'...but no matter what you call it, it tastes delicious! And it's easy to make! Many of our apple varieties are great for baking. We like Jonathan, Jonagold, Honeycrisp or Empire, just to name a few. Special thanks to long-time staffer, Teanna, and neice, Summer, for their help developing this yummy recipe!
Servings Prep Time
12 servings 30 minutes
Cook Time Passive Time
45 minutes 45 minutes
Servings Prep Time
12 servings 30 minutes
Cook Time Passive Time
45 minutes 45 minutes
Ingredients
Start with
  • 6 medium apples
  • 1 cup apple cider (sub water if necessary)
  • 12 Tbs raspberry rhubarb jam (Smith Berry Barn brand is the best!)
For the Topping
  • 1/2 cup butter
  • 1/2 cup all purpose flour
  • 1/4 cup brown sugar
  • 1/4 cup oatmeal
  • 1/4 cup hazelnuts (chopped)
  • 1/2 tsp ground cinnamon
  • 1/4 tsp salt
  • 1 pinch freshly grated nutmeg
Servings: servings
Instructions
Prep the apples
  1. Preheat oven to 350 degrees.
  2. Core each apple and slice in half length-wise.
  3. Scoop out a bit more of the center of each cored area to create a small well for the jam.
  4. Fill each well with approximately 1 Tbs jam.
  5. Place apples (cut side up) in a 9"x13" baking dish.
  6. Pour cider (or water) into bottom of baking dish.
Prep the Crisp
  1. Mix all remaining ingredients with a pastry blender until blended and crumbly. A food processor will work, as well, but be careful not to over-mix.
  2. Evenly distribute the topping mixture on top of each apple half, mounding and pressing lightly to keep it in place.
  3. Bake 35-45 minutes, until apples are softened and topping is golden-brown. Test for doneness by piercing apple with a fork. Baking times will vary depending on the variety of apple you choose.
  4. Serve warm with vanilla ice cream.
Recipe Notes

This recipe can easily be cut in half using an 8"x8" baking dish and half the apples. ??However, we recommend preparing the entire topping recipe, so you can refrigerate or freeze the other half to use at a later date.

Pumpkin Puree

October 12, 2016
Course

Pumpkin Puree
Print Recipe
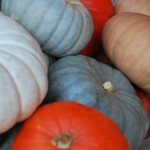
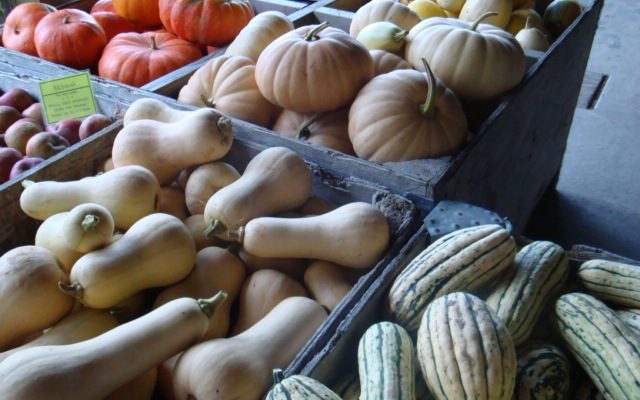
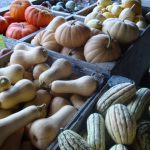
There are a variety of pumpkins and squash that are great for baking. Some of our favorites include Cinderella, Sugar Pie, Sweet Meat, Jarrahdale and Long Island Cheese. We prepare our pumpkin puree in large batches during the fall and freeze it in 1 - 2 cup increments for later use in pies, risotto, soup, etc.
Servings Prep Time
1 cup/pound 30+ minutes
Cook Time Passive Time
1+ hours 1+ hours
Servings Prep Time
1 cup/pound 30+ minutes
Cook Time Passive Time
1+ hours 1+ hours
Ingredients
  • 1 whole pumpkin or winter squash
Servings: cup/pound
Instructions
Pumpkin Prep
  1. Carefully cut top of pumpkin off to create a flat side to help aid in cutting pumpkin.
  2. Cut pumpkin in half, using a large, heavy duty kitchen knife.
  3. Scoop out seeds and reserve for later use (Toasted Pumpkin Seeds!) using a large, sturdy spoon.
Steam Method
  1. Prepare a large stock pot with steamer insert and several inches of water. Bring water to a simmer until ready to use.
  2. Peel skin off pumpkin and slice into smaller pieces...small enough to fit into steamer basket.
  3. Steam pumpkin pieces over simmering water in steamer basket for approximately 30 minutes, or until fork-tender.
  4. You will likely need to work in batches, depending on the size of your pumpkin and steamer basket.
  5. See instructions for 'How to Puree' below.
Oven Method
  1. Preheat oven to 350 degrees.
  2. Place pumpkin pieces on baking sheet and roast in oven for 45+ minutes, until flesh is softened when pierced with a fork.
  3. Once cooked through, remove from oven and allow to cool until pumpkin can be handled.
  4. Peel or scrape the skin of the pumpkin from the flesh and discard the skin.
  5. See instructions for 'How to Puree' below.
How to Puree
  1. Regardless of the cooking method you choose, the final steps will be the same for each.
  2. Place cooked pumpkin in food processor and process until smooth. You may need to work in batches depending on the amount of pumpkin you are making.
  3. Once processed, place pumpkin into a strainer lined with cheesecloth and allow to drain for several hours. This helps reduce the water content in your puree and will vary depending on the type of pumpkin you are using.
  4. Divide into freezer bags in 1-2 cup increments and freeze for later use.

Pumpkin Chocolate Chip Cookies

October 12, 2016
Course

Pumpkin Chocolate Chip Cookies
Print Recipe
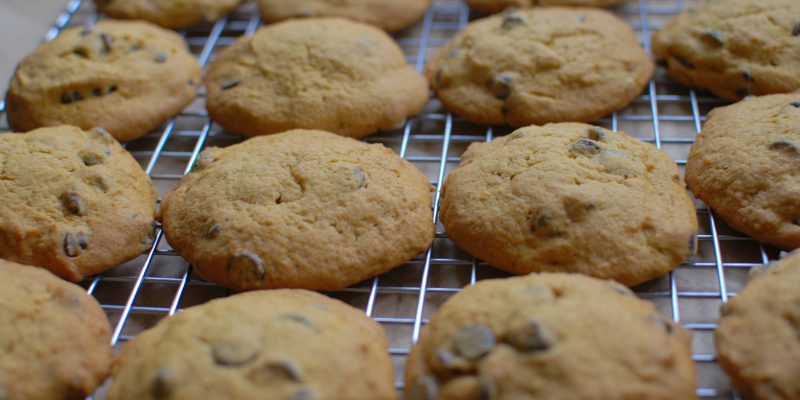
You may have tasted these wonderful cookies at our annual Heirloom Apple Festival. The recipe comes from 'Native American Cooking' and was originally introduced to us by our friends at Wood Haven Preschool.
Servings Prep Time
24 cookies 30 minutes
Cook Time Passive Time
15 minutes 15 minutes
Servings Prep Time
24 cookies 30 minutes
Cook Time Passive Time
15 minutes 15 minutes
Ingredients
  • 1 cup sugar
  • 1 cup unsalted butter (softened)
  • 1 cup canned solid-pack pumpkin (or fresh equivalent)
  • 1 egg (slightly beaten)
  • 1 tsp vanilla
  • 2 cups all purpose flour
  • 1 tsp baking soda
  • 1/2 tsp salt
  • 1/2 tsp freshly grated nutmeg
  • 1/4 tsp ground allspice
  • 1 cup semi-sweet chocolate chips
  • 1/2 cup chopped walnuts (optional)
Servings: cookies
Instructions
  1. Preheat oven to 350 degrees.
  2. Line cookie sheet(s) with parchment paper.
  3. In a large mixing bowl, cream the sugar and butter until fluffy.
  4. Add the pumpkin, egg and vanilla and beat until smooth.
  5. In a separate bowl, combine the flour, baking soda, salt, nutmeg and allspice.
  6. Slowly add the dry ingredients to the pumpkin mixture, small amounts at a time, and blend until completely mixed.
  7. Stir in chocolate chips and walnuts (if desired), until well-combined.
  8. Drop cookie dough by spoonfuls (we use a small ice cream scoop) approximately 2 inches apart on cookie sheet(s).
  9. Bake for 12-15 minutes or until golden brown. Cookies should be puffed slightly and will be cake-like in the center when cooked through.

Roasted Winter Squash

October 12, 2016

Roasted Winter Squash
Print Recipe
Any winter squash can be roasted in this manner, simply pierce the flesh with a fork to test for doneness.
Servings Prep Time
4+ servings 30 minutes
Cook Time Passive Time
1+ hour 1+ hour
Servings Prep Time
4+ servings 30 minutes
Cook Time Passive Time
1+ hour 1+ hour
Ingredients
  • 3 lbs winter squash (acorn, delicata, butternut or other small to medium squash)
  • salt & fresh ground pepper
  • 1/2 cup unsalted butter
  • 2 Tbs fresh sage (chopped)
  • 1/4 cup balsamic vinegar
  • 1/4 cup dark molasses (optional)
Servings: servings
Instructions
  1. Preheat oven to 400 degrees.
  2. Cut each squash in half lengthwise, scoop out seed cavity (saving seeds for toasting later!) Squash may be peeled and cubed if you prefer this method.
  3. Place squash halves in 9"x13" baking dish(es) with cut side facing up.
  4. Season with salt and pepper.
  5. Melt butter over medium-low heat, until just starting to brown.
  6. Add sage, vinegar and molasses to melted butter and heat for 1-2 minutes to blend flavors.
  7. Pour mixture evenly over squash.
  8. Bake approximately 1 hour, or until fork tender.
  9. Allow squash to cool somewhat, then scoop out flesh and transfer to food processor.
  10. Process just until smooth. Pureed squash can be used in many dishes and can be frozen for later use.
Recipe Notes

Feel free to use this pureed squash in any recipe you wish. ??We like to add it to polenta, risotto or simply as a side dish, with a little butter on top!

Winter Squash Soup

October 12, 2016
Course

Winter Squash Soup
Print Recipe
We serve this hearty soup at our annual Heirloom Apple Festival and it gets rave reviews! Use any type of winter squash you would like, just vary the quantity, depending on the size of the squash.
Servings Prep Time
8 servings 1 hour
Cook Time Passive Time
1.5 hours 1 hour
Servings Prep Time
8 servings 1 hour
Cook Time Passive Time
1.5 hours 1 hour
Ingredients
For the Squash
  • 4 each acorn squash (or 2 medium butternut or 1 hubbard or other large squash)
  • 2 each fresh pears (peeled, cored and quartered)
  • 1 each sweet onion (quartered)
  • 1/4 cup melted butter
  • salt and pepper to taste
For the Soup
  • 4 cups chicken broth (sub vegetable broth for vegetarian option)
  • 1/4 tsp ground red pepper
  • 3/4 tsp ground cinnamon
For the Finish
  • 1-1/2 tsp salt (or to taste)
  • fresh ground pepper (liberal or to taste)
  • 1 cup heavy whipping cream
Servings: servings
Instructions
To prepare squash
  1. Preheat oven to 400 degrees.
  2. Cut squash in half, scoop out seeds and place in 9"x13" baking dish with cut-side facing up. You may need more than one baking dish depending on the size of your squash. See notes below.
  3. Place onions and pears around squash, filling all the spaces in the baking dish.
  4. Drizzle with melted butter and season with salt and pepper.
  5. Bake in oven approximately 45 minutes, or until fork-tender.
  6. Remove from oven and allow to cool enough that you can handle the squash. Scoop the flesh of the squash, discarding the skins.
  7. Place all ingredients from baking dish(es) into large stockpot and proceed with making the soup.
To prepare soup
  1. Add all remaining ingredients to stock pot with the squash mixture.
  2. Heat on medium heat, stirring occasionally, until mixture begins to bubble.
  3. Reduce heat to low and simmer, stirring occasionally, for 20 minutes.
  4. Remove soup from heat and puree the soup using an immersion blender. Puree until smooth (you may have a few onion pieces that won't puree...that's fine!)
To finish soup
  1. Add the heavy whipping cream, salt and liberal grindings of fresh pepper and stir to combine.
  2. Taste for seasonings and adjust if necessary.
Recipe Notes

We find that because of the varying sizes in squash, it's sometimes necessary to use more than one baking dish to roast the squash. ??Your baking dishes should be full but not too full, so if necessary, place ingredients into two dishes and place them side by side in your oven.

Also, the seasonings may need adjusting, due to the variations in the squash. ??Simply taste your soup and add more of each of the seasonings to taste. ??This soup comes out a little different each time we make it, but it's very forgiving!

Enjoy this soup with a crusty loaf of bread and a salad as a complete meal...or serve as an appetizer in small mugs at a holiday gathering.

If you end up with too much soup, place remaining soup in freezer containers and freeze for a later date! ??Enjoy!

Baked Apples

October 11, 2016
Course

Baked Apples
Print Recipe
This is an easy dessert that can be modified with whatever ingredients you have on hand. Or, use your creativity for new flavor combinations. This basic recipe can be followed with nearly any apple variety and any filling combination (baking times may vary).
Servings Prep Time
4 servings 20-30 minutes
Cook Time
30-40 minutes
Servings Prep Time
4 servings 20-30 minutes
Cook Time
30-40 minutes
Ingredients
Start with:
  • 4 large apples (see variety notes below)
  • 1/2 cup apple cider
For the filling:
  • 1/4 cup brown sugar
  • 1/2 tsp cinnamon
  • 1 tsp crystallized ginger (finely chopped - optional)
  • 1/4 cup hazelnuts (chopped)
  • 1/4 cup oatmeal (or try dried cranberries, raisins, etc)
  • 1 Tbs butter (divided)
Servings: servings
Instructions
To start:
  1. Preheat oven to 375 degrees.
  2. Remove the core from each apple and place in an 8"x8" baking dish. You may wish to core out a little extra apple to make room for more filling.
  3. Pour apple cider into the bottom of the baking dish.
For the filling:
  1. Mix all ingredients in a small bowl and generously fill each apple with the filling.
  2. Place a small piece of butter on top of the filling on each apple.
To bake:
  1. Bake at 375 degrees for approximately 30 minutes. Check for doneness by piercing the apple with a fork.
  2. Bake for an additional few minutes if still firm towards the center. Different apples will take more or less time depending on the density of the flesh.
To serve:
  1. Serve warm with a scoop of vanilla ice cream. Make sure to scoop the extra juices from the baking dish and drizzle over the top of the ice cream.
Recipe Notes

Some of our favorite apples for baking are Jonathan, Jonagold, Honeycrisp, Northern Spy and Rome Beauty. ??Visit our Orchard Variety page for more details on each variety.

Blackberry Cobbler

July 29, 2016
Course

Blackberry Cobbler
Print Recipe
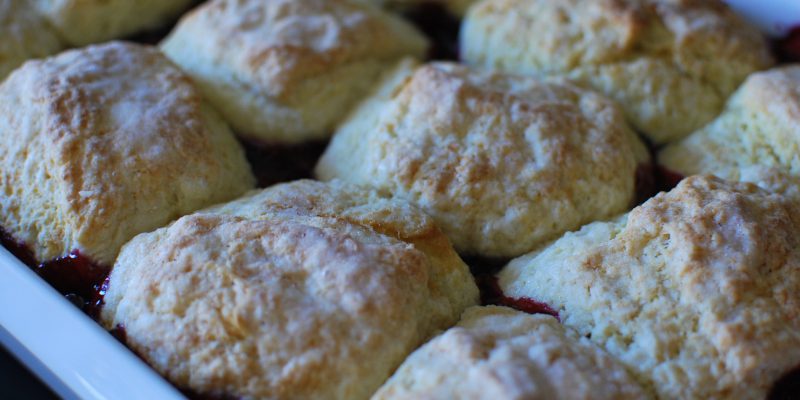
This is the cobbler we serve every year at our Berry Festival. Try it with a mixture of blackberries like marionberries and boysenberries or, later in the season, try mixing our Triple Crown blackberries with blueberries. There's no combination that isn't delicious!
Servings Prep Time
12 servings 30-40 minutes
Cook Time
50-55 minutes
Servings Prep Time
12 servings 30-40 minutes
Cook Time
50-55 minutes
Ingredients
Ingredients for Filling:
  • 10 cups fresh blackberries (sub 2 cups blueberries if desired)
  • 3/4 cup sugar
  • 3 Tbs cornstarch
  • 1/2 lemon (juice and zest)
Ingredients for Dough Topping:
  • 2 1/2 cups all purpose flour
  • 1/4 cup sugar (plus more for spinkling)
  • 2 tsp baking powder
  • 1 tsp baking soda
  • 1/2 tsp salt
  • 1/2 cup melted butter (plus additional 1-2 Tbs, melted for topping)
  • 3/4 cup buttermilk
Servings: servings
Instructions
To prepare the filling:
  1. Preheat oven to 350 degrees.
  2. Place rinsed berries in large mixing bowl. Add lemon juice,lemon zest, sugar and cornstarch and stir gently to combine.
  3. Pour berry mixture into a buttered 9"x13" baking dish. Place in preheated oven and bake for 30 minutes. While the filling bakes, begin preparing the dough.
To prepare the dough:
  1. In large mixing bowl, combine flour, sugar, baking powder, baking soda and salt.
  2. In glass measuring cup, measure out the buttermilk and mix in the melted butter until smooth and creamy. It works best if you allow the melted butter to cool slightly before mixing.
  3. Slowly add buttermilk mixture to the flour mixture and stir until a soft dough forms. Bring dough completely together with your hands, if desired.
  4. Pat dough into a flattened disc and divide into 12 equal pieces. Form and flatten the dough pieces into rounded discs.
To finish baking:
  1. After the filling has baked for 30 minutes, remove from oven and raise oven temperature to 375 degrees.
  2. Carefully place each of the dough pieces on top of the hot berry filling in an even pattern.
  3. Melt an additional 1-2 Tbs butter and brush gently on the tops of the dough. Sprinkle with sugar to finish.
  4. Bake uncovered for an additional 20-25 minutes, until crust is golden brown and filling is bubbly. This cobbler is best served warm with vanilla ice cream.
Recipe Notes

If you don't have buttermilk on hand, you can easily substitute with a milk/lemon juice combo. ??Simple measure the same amount of milk and add approximately 1 Tbs of lemon juice. ??You may also use 1/2 cup of whipping cream or half and half along with 1/4 cup sour cream.